Thursday, March 5, 15:41:24 2015
Banking with EziAccounts

Processing your banking with EziAccounts is made simple!
Open your Banking feature from your main screen to open a window that looks like this:

Please note that any clickable links are coloured blue and the '?' icons provide you with help along the way.
Click on the blue link for the name of the account to open the edit screen for this account.
New bank accounts should only be added in this window by clicking on the 'New' wizard button located on the top menu bar.
As you can see on the top menu, there are a range of options including; completing reconciliations, bill payments and receipting funds.
Auto Billing
You can also open the 'Auto Billing' feature from this main screen at any time by clicking on 'Auto'. When you open this window the feature is temporarily halted for editing. You must re-submit the screen to reactivate the monitoring service to track the auto entries.
This feature allows you to create and deploy automatic entries like;
- Invoices for repeated billings like subscriptions,
- Orders from suppliers who regularly bill you like mobile phone plans,
- Payments that you make repeatedly like rent payments.
Please refer to the 'Auto Billing' blog for more details.
Importing Bank Statements
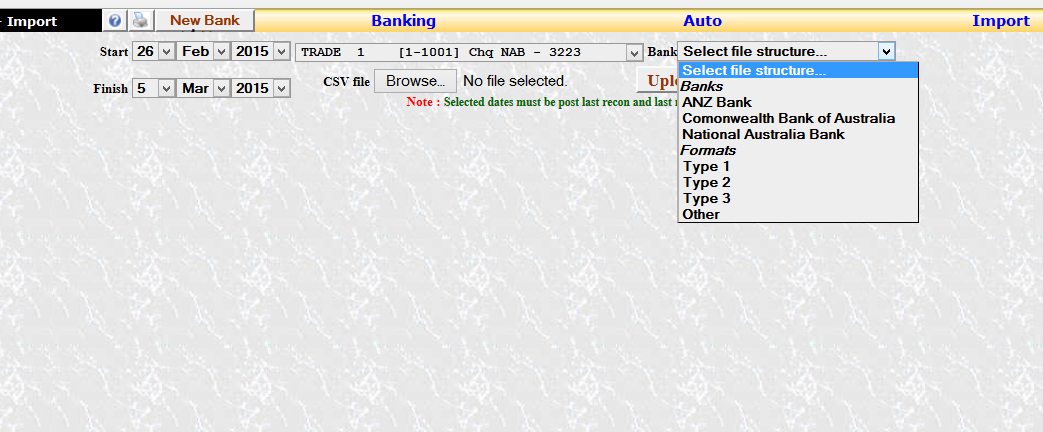
Click on the 'Import' button at the top of the screen to open this function. Check which account you want to import to and the dates covered by the import.
Then select which bank you are importing the file from. Each bank's format has been installed into the system.
Browse your computer for the file you want to import ..
When you are ready click on 'Upload'.
The software developer is planning to use the bank API systems to include the ability to access your bank accounts directly to import the figures. This features is not yet available, but it is coming!
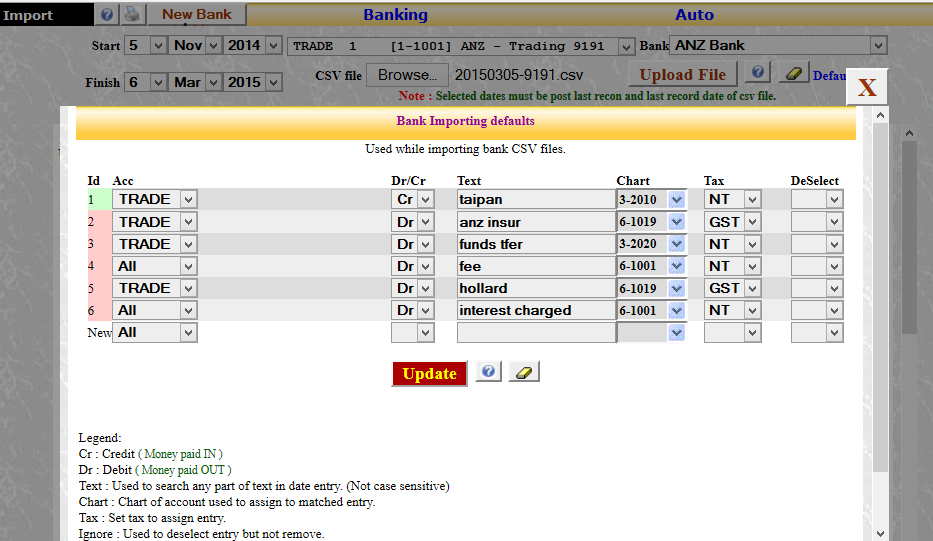
Once the file has been imported, you will be taken to the screen that applies the 'import rules'. On the main screen you will see a 'defaults' link that opens a screen to define the importing rules. These rules are used to determine how the imported transaction is to be posted. Check the blog on 'Importing transaction rules' for more information.
The imported data screen looks like this:
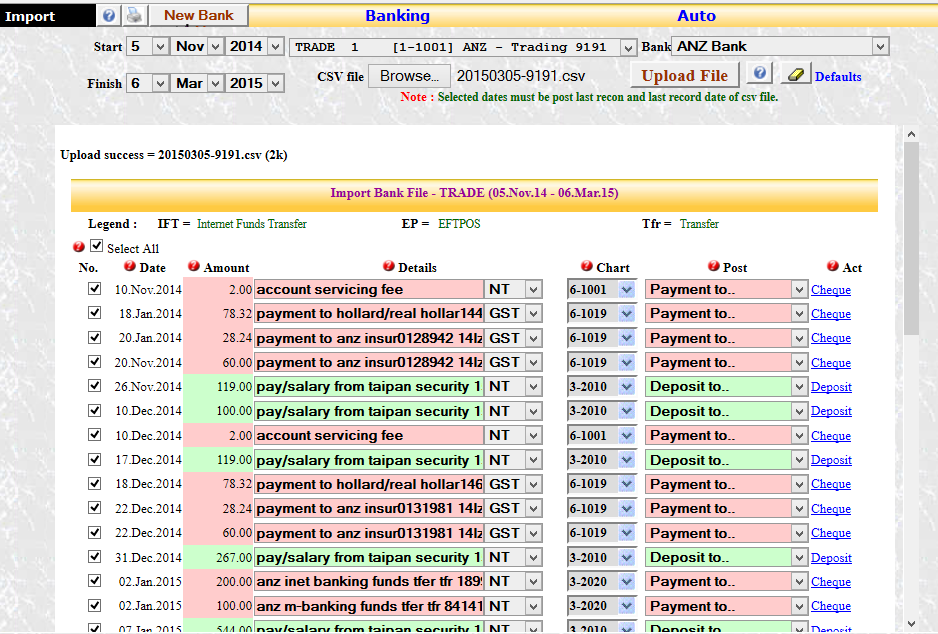
You can review and change each transaction before it is imported into the ledger record.
Posted by eziaccounts.com.au


 Blogs
Blogs
